
Tuesday, March 24, 2020
Monday, March 23, 2020
AWS Systems Manager - Apply Chef Recipes


AWS Systems Manager eases the operations and maintenance of automation(s) of common administrative and security tasks from one single window which is AWS Systems Manger Console via 'Run Command'. We can perform lot of tasks like applying IAM role to EC2 instances, Attach EBS Volumes, Run Ansible Playbooks at target nodes without having to have access to keys of those instances
Now, AWS has come up with yet another feature which was most awaited, i.e., to run Chef Recipes in AWS Instances irrespective Windows or Linux OS
Pre-requisites:
- AWS Console login credentials
- Console or Program access to S3, AWS Systems Manager - Run Command
Getting Started:
- Login to AWS Console
- prepare Chef recipes that would run from Chef version 11
- Place the Chef Cookbooks in Github or in S3 bucket
- Open AWS Systems Manager Console
- Click on 'Run Command' under 'Actions and Change' menu section
- Click on 'Run Command' at right corner
- Find the option 'AWS-ApplyChefRecipes' and click on the same

- Now configure your 'Source Type' either S3 or Github, wherever the Chef cookbooks are stored

- Define the S3 path of code location in 'Source Info'

- Define list of 'cookbooks' to run in 'Runlist' box

- Pass any JSON attributes if required for the cookbook in 'JSON Attribute' box

- select 'Chef Version' according to your code compatibility; supports since Chef 11

- specify target instances to run these 'Chef Recipes' by 'Tags' or 'Select Manually' or by 'Resource Group'
- Define 'S3 output' logging location, if required
- Lastly, define SNS notifications, if required and finally click on 'Run' in order to execute the Chef Recipes in target nodes selected
Enjoy cooking Chef Recipes in AWS Systems Manager !!
Saturday, March 21, 2020
HowTo Upgrade to AWSCLI Version 2

While launching instance in EC2, instances come with default AWSCLI verison 1.xx.xx installed. If we have to use the latest features in line with what AWS releases across services, aspected with AWSCLI, we will have to upgrade the CLI version to 2.x
Let us see how to do this in EC2 instances
Pre-requisites:
- AWS Login access & credentials
- Permissions and/or Access policies to upgrade utilities/tools in EC2
- Log in to the AWS Console
- Launch an EC2 under free-tier or log in/ssh into your EC2 via putty or other modes of connection allowed to you
- run 'sudo yum update -y', if required
- check the currently available awscli version
- download and unzip the awscli bundle from aws location
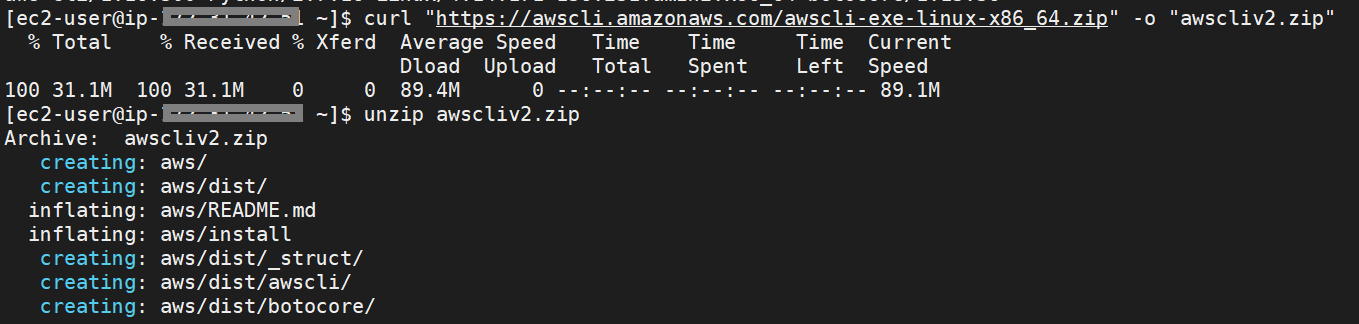
- run sudo install

- check for the new version updated by looking at the default location where awscli is installed & symlink created(at /usr/local/bin/)

- Now restart or start a new session in the EC2 and check for the version of awscli

Friday, March 20, 2020
Thursday, March 19, 2020
Wednesday, March 18, 2020
Amazon Redshift Cluster - Pause and Resume - Series 6
- 'Pause on Schedule' or 'Resume on Schedule' is an option where in we can define 'Pause' & 'Resume' based on a cron schedule. For example, I can set for 'Pause' on end of day Friday or Weekend and set for 'Resume' by early Monday Morning or Beginning of the the week, as per the operational needs


- This comes handy, when we have non-prodcution clusters which can be set to 'Pause' state until it is needed later

- Quick catch is that, when we define 'Pause on Schedule' and if you have selected a 'Resume' window as well, then there are two different schedules that are created to handle the 'Pause' and 'Resume' each separately

Tuesday, March 17, 2020
Sunday, March 15, 2020
Saturday, March 14, 2020
Amazon Redshift Cluster - Pause and Resume - Series 2
Let us create a Amazon Redshift Cluster and setup 'Pause & Resume'
- Log in to the AWS console using your AWS account credentials
- Go to the Amazon Redshift Console and create a cluster
- Select the type/nodes of the cluster to be created, as per the requirements. As this is for demonstration, I have selected 'dc2.large' type with 1 Node for obvious reasons
 | |
| Amazon Redshift - Select a Cluster as per the needs |
4.Now click on configure the cluster by specifying Cluster Name, Master User name, password

5.Watch the cluster being provisioned

6.Now available
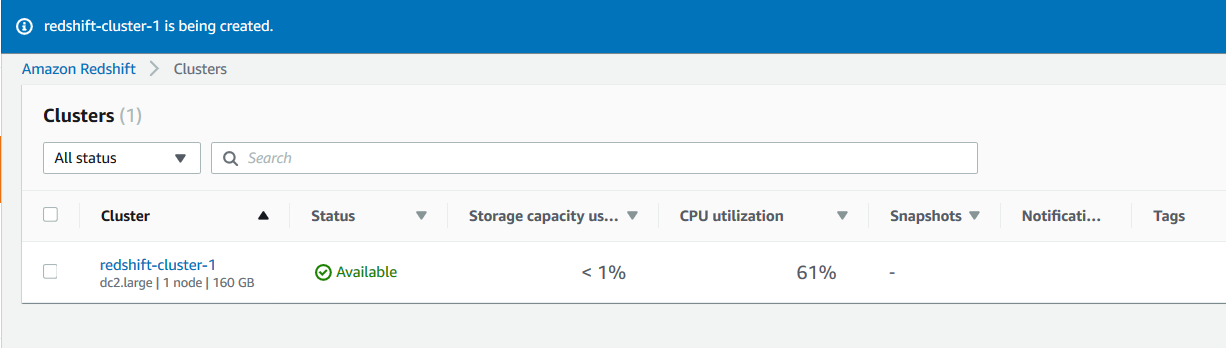
Thus we created a Amazon Redshift Cluster Successfully
Thursday, March 12, 2020
Wednesday, March 4, 2020
HowTo get list of software installed in RHELx OS machines
HowTo get list of software installed in RHELx OS machines

Subscribe to:
Posts (Atom)